

Hello friends! Today I am going to tell you about a project I have been working on for the few weeks. I have been updating the look of our kitchen. It all started when I took a good look at my window treatments and realized I was truly tired of them. They worked perfectly for the mix of chef/fruit themed decor I had going eight years ago. But alas, I am more than sick of that look.
I should have taken BEFORE photos, but the photo below is the only one I could find. Sorry. Just lots of white and lots of fall-ish colors.

The real genesis of the re-do was when I entered a contest (which I did not win) for a kitchen remodeling courtesy of HGTV and LG appliances. I had to create a Pinterest board of the kitchen I would like. While trying for something original, I went with a French Country Glam look. It was truly the blues, grays, and French fabrics that attracted me.
Even though I did not win the contest, nor did I expect to, I had a backup plan - redo the parts of my kitchen that bothered me the most. I decided to focus on the window treatments, the cabinet colors, the lighting, and the decor details.
Mid-February - I sat down and made my plan for updating the kitchen. I found a pattern for my new window treatment at Pate-Meadow.com. I have used their patterns before and I like many of their designs. I ordered the pattern and the interlining (not interfacing, but a thicker lining for window treatments).

I purchased the face, lining, and piping fabrics this week also. I took FOREVER selecting fabric.
Over the weekend, after all of my pattern and fabrics arrived, I spent several hours editing the pattern to make it fit the print repeat on my face fabric. I removed an inch from the length and 1.75 inches from each of the window treatment sections. And then I moved on to cutting the fabric sections and sewing the panels together before cutting the pattern (the actual pattern single piece is about 6 feet long and I will need to repeat it 3-4 times for my full bay window). Yikes.
It was a lot of work, but I LOVE the new window treatments:

**I am going to confess to being intimidated by the size of this pattern. The overall magnitude of the project had caused me to leave it on the dining room table for three weeks before the sewing commenced.

Late February - I spent time searching for the best (read least expensive) place to buy glass shelves. I want to add an indoor herb garden to the bay window. My inspiration for this came from two Pinterest images I found weeks ago.


I scored a total win at a local glass company. All three glass shelves, with finished front edge, cut to size with 3/8 inch glass for strength, will cost around $25. Yay!
I planted my herb seeds and as you can see in the photos below, my baby herbs are growing!!!


Canisters - I purchased new canister for to accent the new kitchen design. I wanted something to go with the low key French-ish look and to compliment the new colors. You may have seen the post I did transforming the canisters HERE. I added a fleur de lis border and French names to the canisters in vinyl. I think they look much more elegant with the border.


March 7 - I found the light fixtures I want to use to replace the yucky builder's basic long, tubular, white kitchen light fixture and the so-so breakfast nook light. I have wanted to replace that ceiling hugging double florescent tube, long white light for soooo long.
I ordered matching lights for the kitchen and breakfast nook, with the kitchen fixture being larger. I also ordered blue chandelier lamp shades.


Our electrician installed the lights in the kitchen as well as move two others in the house. Our electrician is Chris Powell, owner of Powell Plumbing and Electrical, LLC in Aiken, SC. I cannot say enough about how great Chris and his associate were. They even let me photograph them for the blog!! If you live in the area and need an electrician, DO contact me and I will pass along Chris' contact information.


While waiting for Spring Break to arrive so that I could complete the painting without Avaleigh as a helper (the child has far too many hands for me to paint with her in the house), I decided to cover my white front dishwasher and oven with faux stainless film. We plan to update our dishwasher in the not too distant future and will go with a stainless front, but in the meantime I thought the white fronts would really stand out in the kitchen. With careful measuring and cutting, the film worked well.

I honestly think the faux finish looks pretty good on the stove and dishwasher.

Again, while awaiting the arrival of Spring Break, I began updating the wall and counter decor. I was so tired of the colors in my kitchen!! I have always liked blue and as luck would have, I also collect various china patterns. I went through my stash of blue china and found some old bread plates and Spode Garden plates that I decided to use in the kitchen. In fact the only new purchase for wall decor is the iron piece in the photo above. Everything else came out of my dish stash.
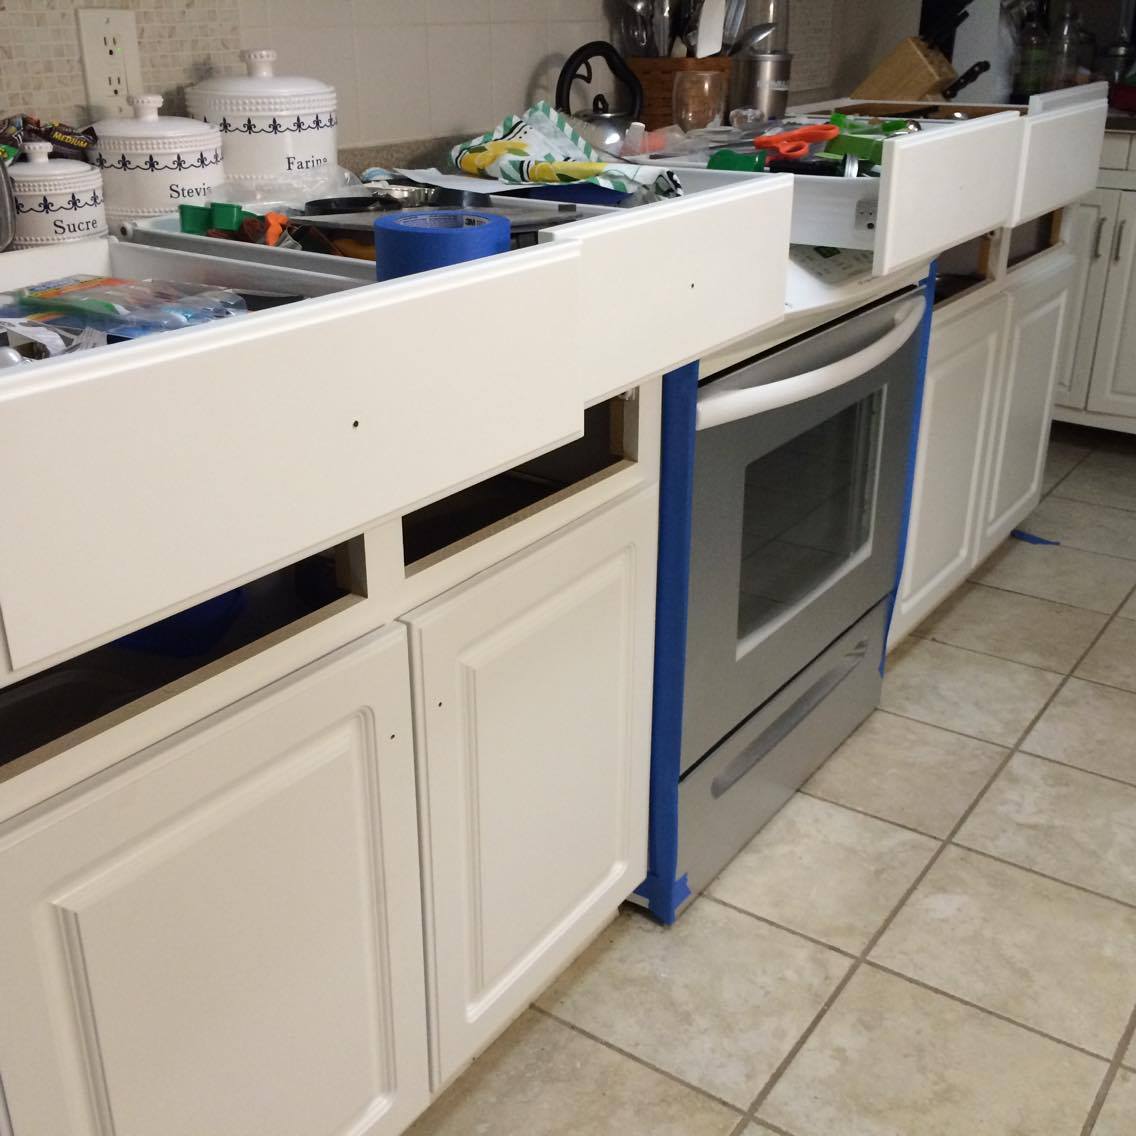
Spring Break - Finally, finally, finally (!) Spring Break arrived and with it, the painting began!! First I started to dis-assemble the kitchen and prepare for painting.

We had take out four days in a row as the painting project was going on! But I think the end result was well worth the effort! I painted the lower cabinets only, Winter Fog. This was another of the Rust-Oleum kits. This kit was made especially for kitchen cabinet. NO SANDING required.


A final word about the island in my kitchen. The stainless topped island is on wheels and includes a flip up bar on the backside. It is great for serving when we have a party and the rest of the time it is home to several large counter top appliances. Previously it too was white. When I finished painting the cabinets, I took the leftover gray paint and added some of the blue from the buffet I painted a few weeks ago. I made a gray-blue color and used that to paint the island. I positioned it at the end of the cabinets so to better show the color for the photos.
The final update in the kitchen is the new runner on the floor. I feel that the runner pulls the blues and grays together. It brings harmony to the entire area.

I planted my herb seeds and as you can see in the photos below, my baby herbs are growing!!!


Canisters - I purchased new canister for to accent the new kitchen design. I wanted something to go with the low key French-ish look and to compliment the new colors. You may have seen the post I did transforming the canisters HERE. I added a fleur de lis border and French names to the canisters in vinyl. I think they look much more elegant with the border.


March 7 - I found the light fixtures I want to use to replace the yucky builder's basic long, tubular, white kitchen light fixture and the so-so breakfast nook light. I have wanted to replace that ceiling hugging double florescent tube, long white light for soooo long.
I ordered matching lights for the kitchen and breakfast nook, with the kitchen fixture being larger. I also ordered blue chandelier lamp shades.


Our electrician installed the lights in the kitchen as well as move two others in the house. Our electrician is Chris Powell, owner of Powell Plumbing and Electrical, LLC in Aiken, SC. I cannot say enough about how great Chris and his associate were. They even let me photograph them for the blog!! If you live in the area and need an electrician, DO contact me and I will pass along Chris' contact information.


While waiting for Spring Break to arrive so that I could complete the painting without Avaleigh as a helper (the child has far too many hands for me to paint with her in the house), I decided to cover my white front dishwasher and oven with faux stainless film. We plan to update our dishwasher in the not too distant future and will go with a stainless front, but in the meantime I thought the white fronts would really stand out in the kitchen. With careful measuring and cutting, the film worked well.

I honestly think the faux finish looks pretty good on the stove and dishwasher.

Again, while awaiting the arrival of Spring Break, I began updating the wall and counter decor. I was so tired of the colors in my kitchen!! I have always liked blue and as luck would have, I also collect various china patterns. I went through my stash of blue china and found some old bread plates and Spode Garden plates that I decided to use in the kitchen. In fact the only new purchase for wall decor is the iron piece in the photo above. Everything else came out of my dish stash.
Spring Break - Finally, finally, finally (!) Spring Break arrived and with it, the painting began!! First I started to dis-assemble the kitchen and prepare for painting.
We had take out four days in a row as the painting project was going on! But I think the end result was well worth the effort! I painted the lower cabinets only, Winter Fog. This was another of the Rust-Oleum kits. This kit was made especially for kitchen cabinet. NO SANDING required.


A final word about the island in my kitchen. The stainless topped island is on wheels and includes a flip up bar on the backside. It is great for serving when we have a party and the rest of the time it is home to several large counter top appliances. Previously it too was white. When I finished painting the cabinets, I took the leftover gray paint and added some of the blue from the buffet I painted a few weeks ago. I made a gray-blue color and used that to paint the island. I positioned it at the end of the cabinets so to better show the color for the photos.
The final update in the kitchen is the new runner on the floor. I feel that the runner pulls the blues and grays together. It brings harmony to the entire area.

Thanks for stopping by and viewing my kitchen update. I will be back soon with a couple of new paper crafting projects!


